Animations are certainly NOT my specialty when it comes to SolidWorks. I have created a few animations over the years but I have never really been completely satisfied with the quality of the videos I have produced. Is it because of shortcomings in the software? No, it is mainly my lack of time to learn all the ins and outs of creating a good animation.
One of the jobs that we are working on right now includes the creation of some animations to be placed into a PowerPoint presentation. With this our CAD department is finally digging into the animation portion of SolidWorks and have already put out some GREAT animations. I am also fortunate in that I have some great Blogger friends in Matt and Rob that I can bounce a few questions off of.
I thought I would pass along a few tips on how you can get some good results quickly when creating AVI files using Motion Manager. Let’s take a step back first and review one of the big changes in SolidWorks 2008. The SolidWorks Animator product was removed as an add-in and included (with all of it’s functionality) across the entire SolidWorks product line under what is now called Assembly Motion.
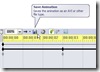
 Rather than covering all the dos and don’ts on how to set up a Motion Study, what I want to focus on is some methods you can use to get good final results in your animation files. When you select the Save Animation button,
 you are presented with three file options. You can save the file in an .AVI format, which is what most users use, or you can save the animation as a series of Targa or Bitmap images that represent each frame of the video. If you use the image options you will need some sort of third party software to produce the images into a video.
 When you use the .AVI option you have the option to use the SolidWorks Screen to produce the images for each frame of the video OR you can use PhotoWorks. Rendering each frame of the animation can take MUCH longer than using the screen option. Fortunately you can set up Rendering and Animation tasks to automatically run overnight using the SolidWorks Task Scheduler. With the incredible enhancements to RealView in SolidWorks 2008, you can use the SolidWorks Screen option with RealView turned ON and get a very nice result in a fraction of the time it takes using PhotoWorks. This was one of the things I was most excited about last year when 2008 was announced and it has proven to be a useful option in creating animations.
One of the most important settings when creating an animation file is the Frames per second (FPS) setting. The default FPS is 7.5 which can leave the video a bit “choppy”. The higher the FPS, the smoother the motion in the  animation. We have seen good results using 20-30 FPS. Once you click “Save” you are presented with one last window asking you how you want to compress the video. The default setting is “Microsoft Video 1”. This is the safest compression option but does NOT give the best results. We found that shadows, faces, and edges tend to get blurred and show grids patterns and lines that should not be present. The results can be improved with by using the Cinepak Codec that is available in all default SolidWorks installations. Users who view the video will need to have the Cinepak Codec installed on their system.
If you have Camtasia Studio installed on your machine you can use the TechSmith Screen Capture Codec (TSCC) option. Camtasia Studio is an absolutely awesome screen capture utility that I would say is used for a large majority of CAD vendor generated Demonstration Videos that you will find out there today. Like the Cinepak, the TSCC codec must be installed in order to see the video.
Another setting to watch would be the Key Frame number. Typically the lower the number the better but we have found that a Key Frame every 8 seconds tends to work very well. Decreasing this number does not result in as dramatic of an effect on the video as increasing the FPS.
One other notable option is the Full Frames (uncompressed) option. Since there is no video compression the resultant AVI file is HUGE! If you play the file using most media players the file will be very choppy. (This really confused me at first.) This appears to be a side effect of the file size and lack of compression. This HUGE file actually works very well if you import it into video production software such as Camtasia in that it can be used to create very nice Flash or Quicktime videos.
If you use the a codec the AVI will still in most cases upload to most video share sites. Since I cannot share publicly the animations we are working on now for obvious reasons, I prepared a very simple sample of an animation produced using the above recommended methods. The AVI file did successfully upload to YouTube even though it was made using the TSCC Compression. I lost a little bit of the quality in the upload process but the smoothness of the video gets the point across. Click below to see the video.

Stay tuned….much more to come!
Updated 4-30-08: When I initially wrote this article last night I did not realize that you have to have Camtasia Studio installed in order to use TSCC as the compression agent for the video. I have updated the text above to reflect this.