-
SolidWorks and Animations
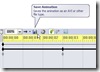
Animations are certainly NOT my specialty when it comes to SolidWorks. I have created a few animations over the years but I have never really been completely satisfied with the quality of the videos I have produced. Is it because of shortcomings in the software? No, it is mainly my lack of time to learn…
-
Direct Modeling: The future?
I’ve put it off writing about this subject matter for quite some time now but with the recent announcement of yet another CAD company touting Direct Modeling, CAD 2.0, Non-History based modeling, or whatever other industry term that is out there, I thought the time was right. Siemens announcement yesterday no doubt shook some foundations…
-
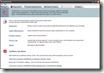
New Improved SolidWorks Knowledge Base

One of the most useful tools in the SolidWorks Customer Portal has had a bit of a facelift today which is sure to be a hit with all SolidWorks users. The SolidWorks Knowledge Base allows you to search posted Solutions and known Bugs (SPR’s) to get more details on topics across all SolidWorks products. It…
-
3dvia – Community and Studio

Well, its time for Chapter 2 in my definition search of 3dvia. In case you missed it, make sure you catch the first installment of my posts on 3dvia. This time out we are going to look into the Community and Studio sections of the site. The Community area can be accessed by clicking on…
-
3dvia – What is it?

If you frequent ANY CAD or 3D related web sites these days you can’t help but have run across 3dvia somewhere. I’m sure many of you have been wondering like I have what its all about. I’ll take you along with me as I begin to find out for myself just what exactly 3Dvia is. …
-
SolidWorks Rx 2008
One of the enhancements of SolidWorks 2008 that you might have overlooked is the revamping of SolidWorks Rx. The UI has now gone to a multiple tab interface that groups different features that can be used to maintain your system. When you open SolidWorks Rx (Start->All Programs->SolidWorks 2008->SolidWorks 2008 SPX.X->SolidWorks Tools->SolidWorks Rx) the Home tab…
-
SWUGN Technical Summit Nashville – 2008
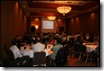
The 2nd SWUGN Technical Summit of 2008 was held in Nashville, TN today. An enthusiastic crowd of 86 SolidWorks users came out to see presentations on both general and specialty topics. Richard Doyle, who is the User Community Manager for SolidWorks, had a last minute scheduling conflict and had to miss this year’s Summit in…
-
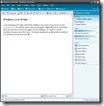
Windows Live Writer
I had lunch today with Brian McElyea who most of you know as the CADFANATIC. He told me about this cool new program called Windows Live Writer that you can use to post messages to your Weblog. So I guess I would consider this post the first test! I’ve been looking for an alternative method…